
Your Ultimate Guide to DIY Screen Doors: Fresh Air & Bug-Free Living!
Y.Walter
Ever wished you could throw open your doors to let that gorgeous spring breeze in, but dreaded the thought of uninvited six-legged guests crashing your party? Well, you're not alone! There's something magical about fresh air circulating through your home, but flies, mosquitoes, and other critters can quickly spoil the mood. The good news? You can have the best of both worlds, and you don't necessarily need to call in the pros or spend a fortune. Welcome to the ultimate guide to DIY screen doors!
This article is your friendly companion on the journey to creating your very own screen door. We'll explore everything from the fantastic benefits of going DIY, to picking the right project for your skills and home, gathering your tools, and, of course, step-by-step instructions for some popular screen door types. We'll even touch on how a do-it-yourself approach can be a game-changer, especially if you're dealing with those tricky, non-standard door openings where off-the-shelf solutions just don't cut it. Get ready to roll up your sleeves, learn a new skill or two, and enjoy that sweet, bug-free breeze!
Why Go DIY for Your Screen Door? The Perks of a Custom Project
Thinking about adding a screen door but wondering if you should tackle it yourself? It's a valid question! While there are plenty of pre-made options out there, taking the DIY route for your screen door comes with a whole host of awesome advantages that might just surprise you.
One of the most appealing reasons is the potential for cost savings. Let's be honest, home improvement projects can add up. By building your own screen door, you can often achieve a fantastic result for a fraction of the cost of buying a factory-built one or hiring a professional for installation. For instance, a simple DIY screen door project can be completed for about $75, which is a significant saving compared to many alternatives. This means you can enhance your home's comfort without emptying your wallet.
Then there's the magic of customization. This is where DIY truly shines, especially if your home has unique features or non-standard door sizes. Ever struggled to find a screen door that fits perfectly? With a DIY project, you're in control. You can tailor the door to your exact dimensions, choose materials that match your home's style, and even incorporate specific features you want. Many DIY screen door kits are designed to be built to your unique specifications, allowing for that perfect, custom fit. This ability to create something truly bespoke is a huge plus. For those with unique architectural features or specific aesthetic goals, building a custom screen door allows for a level of personalization that mass-produced options simply can't offer.
Beyond the practical, there's the immense satisfaction of creation. There's a special kind of pride that comes from standing back and admiring something you've built with your own two hands. It's more than just a door; it's a testament to your skills and effort. And speaking of skills, a DIY screen door project is a fantastic skill-building opportunity. You might learn a bit about woodworking, precise measuring, or how different materials work together. These are skills that can empower you for future home improvement adventures!
The decision to embark on a DIY screen door project often stems from a desire to overcome the limitations of standard, off-the-shelf products. Many homes, particularly older ones or those with custom architecture, feature doorways that don't conform to typical dimensions. In such cases, finding a pre-made screen door that fits perfectly can be a frustrating, if not impossible, task. Professional custom solutions, while effective, can be prohibitively expensive. This is where the DIY approach becomes a powerful enabler. It offers a practical and affordable pathway to achieving a custom-fit solution without the hefty price tag of professional services. This empowerment to solve specific, unmet needs is a compelling driver for many homeowners.
Unlocking the Benefits: More Than Just a Breeze
A DIY screen door isn't just about keeping bugs out; it's about enhancing your entire living experience. The positive impacts ripple through your home in ways you might not have even considered.
-
Enhanced Airflow & Ventilation: This is a big one! Screen doors are champions at promoting better air circulation. You can open your main door while keeping the screen door closed, allowing fresh air to flow in and out. This is perfect for those warmer days when you want to cool down your home naturally and can even help reduce reliance on your air conditioner. Imagine a gentle cross-breeze wafting through your rooms – delightful!
-
Increased Natural Light: Who doesn't love a bright, airy home? Screen doors, with their mesh construction, allow significantly more natural light to filter into your home compared to a solid door. This can make your rooms look and feel more spacious and inviting, and even boost your mood.
-
Pest Protection: This is the primary job, of course! A well-fitted screen door is your first line of defense against mosquitoes, flies, moths, and other unwelcome insects. Enjoy your indoor spaces without the constant swatting.
-
Debris Barrier: Beyond bugs, screen doors can also help stop light debris like leaves, pollen, and dirt from blowing into your home when the main door is open. This means less sweeping and a cleaner indoor environment.
-
Energy Efficiency: By improving natural ventilation and reducing the need for air conditioning, screen doors can contribute to lower energy bills. It's a simple way to make your home a bit more eco-friendly and budget-friendly.
-
Pet Safety (Potential): For pet owners, a screen door can act as an additional barrier, making it harder for curious cats or dogs to dash outside unexpectedly when the main door is opened.
-
Enhanced Curb Appeal & Home Value: A thoughtfully chosen or beautifully crafted DIY screen door can genuinely improve the look of your home's exterior, adding to its charm and potentially its value.
These benefits collectively contribute to a more comfortable, cleaner, and enjoyable living environment. It's not just about a functional barrier; it's an investment in your home's atmosphere and your overall well-being. The improved airflow can lead to better indoor air quality, the increased natural light can uplift spirits, and the reduction in pests simply makes life more pleasant. This holistic improvement elevates the perceived value of a DIY screen door project far beyond a simple practical fix.
Getting Started: Planning Your Perfect DIY Screen Door
Fail to plan, plan to fail, right? This old saying couldn't be more true for DIY projects. Good planning is the secret sauce to a successful and stress-free screen door build. So, before you even think about picking up a hammer or a screwdriver, let’s walk through the crucial planning stages to make sure your screen door project is a roaring success from the get-go!
Which DIY Screen Door is Your Match? (Sliding, Retractable, Roll-Up, Hinged)
The world of screen doors is surprisingly diverse! Choosing the right type for your DIY project depends on several factors, including the type of doorway you have, the space available, your aesthetic preferences, your budget, and, importantly, your DIY comfort level. Let's break down the common contenders:
-
Hinged Screen Doors: These are the traditional workhorses. They swing open, usually outwards, and are attached to the door frame with hinges. They're a great option for standard single doorways and can be made from wood or metal.
-
Sliding Screen Doors: Perfect for patio doors or other wide openings where a swinging door would be impractical. These doors glide smoothly on a track, saving space. They are often made of aluminum or vinyl.
-
Retractable Screen Doors: These are the chameleons of the screen door world. When you need them, they pull out to cover the doorway; when you don't, they roll or fold away discreetly into a housing, preserving your view. They offer a sleek, modern look and are fantastic for various door types, including single doors, French doors, and even large openings. Retractable screen doors come in various configurations, such as single panels for standard doorways, double panels for wider openings like French doors, motorized versions for ultimate convenience, and even large format designs for enclosing entire porches or oversized openings.
-
Roll-Up Patio Screens: Similar in concept to retractable screens, diy roll up patio screen options are often manually operated and can be a simpler DIY project. They are excellent for enclosing porches or patios, allowing you to roll the screen up when you want an open feel and down when you need protection.
-
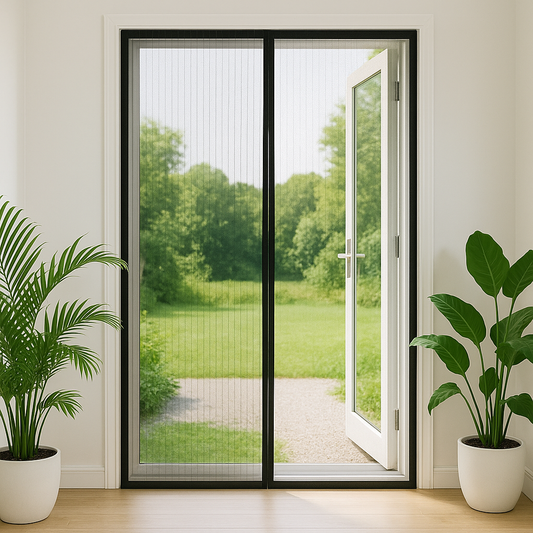
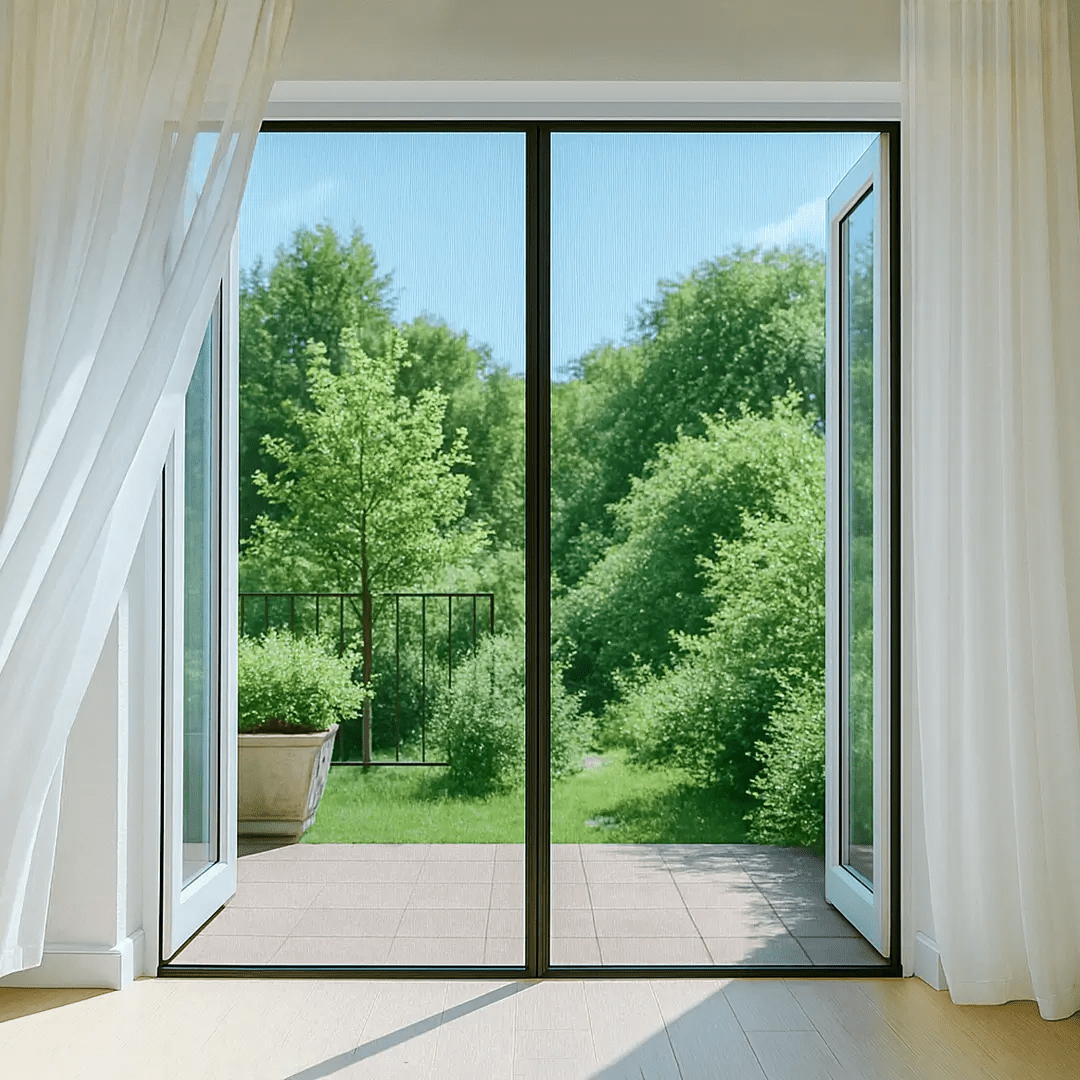
Magnetic Screen Curtains: If you're looking for a super simple, often temporary, and budget-friendly solution, magnetic screen curtains are worth considering. These typically consist of two mesh panels that hang in the doorway and are held closed by magnets. They're easy to install and walk through.
When making your choice, think about how much space you have – a hinged door needs swing clearance, while sliding and retractable doors are space-savers. Consider the type of door you're screening: a single entry, French doors, or a wide patio opening. And, of course, be realistic about your DIY skills. Some projects, like building a wooden hinged door from scratch, are more involved than assembling a retractable screen kit.
Focus on: DIY Retractable Screens for Large Openings
Got a stunning wide patio entrance, elegant French doors, or even a garage you'd love to screen in? Then diy retractable screens for large openings might be just what you're looking for. These systems are fantastic because they can span wide areas, providing an uninterrupted view and seamless indoor-outdoor flow when retracted. Imagine transforming your patio into a bug-free zone or creating a retractable screen wall that disappears when you don't need it.
While the idea of tackling a large retractable screen might seem daunting, many DIY kits are designed to make it manageable. These kits often come with all the necessary components and instructions. For truly expansive or unconventional spaces, some DIYers get creative with pulley systems or even modified hoists, showcasing the ingenuity possible with a hands-on approach. Motorized options are also becoming more accessible for DIY projects, adding a touch of luxury and convenience. The beauty of DIY here is the ability to tailor a solution to those grand, non-standard spaces that might otherwise be difficult or very expensive to screen.
Exploring: DIY Sliding Screen Door Kits
If you're looking for a straightforward way to add a screen to your sliding glass door, a diy sliding screen door kit is an excellent choice. These kits are designed with the home DIYer in mind, offering convenience and often a simpler assembly process compared to building everything from scratch.
What can you expect in a typical sliding screen door frame kit or custom screen door kit for a sliding door? Usually, you'll find pre-cut frame components (often aluminum), the screen mesh itself, spline (the rubbery cord that holds the screen in the frame), rollers for smooth gliding, and a handle. Some suppliers even ship these doors in smaller pieces for easy DIY assembly, allowing you to choose your dimensions, mesh type, and even frame color. This makes achieving a custom fit much more accessible. The availability of such kits really simplifies the process of how to make a sliding screen door or build a sliding screen door effectively.
Measure Like a Pro: Ensuring a Perfect Fit (Especially for Custom Needs)
Listen up, because this is arguably THE most critical step in your entire DIY screen door project: measuring accurately. Measure twice, cut once – or in this case, measure thrice to be absolutely sure! Incorrect measurements are the number one culprit for DIY frustration, leading to doors that don't fit, gaps that let bugs in, or materials wasted.
Here’s how to get it right:
-
General Principles: For any door, you'll need the height and width. Don't just take one measurement for each. Measure the width at the top, middle, and bottom of the door opening. Similarly, measure the height on the left side, in the middle, and on the right side. Why? Because door frames aren't always perfectly square, especially in older homes. You'll generally use the smallest of these measurements to ensure your door will fit.
-
Sliding Doors: When measuring for a sliding screen door, you'll typically measure from the inside of the top track (where the top of the screen door will sit) down to the top of the bottom track (where the wheels will run).
-
Retractable Doors: For retractable screen door kits, follow the manufacturer's instructions meticulously. They will specify exactly where to measure. Often, you'll measure the full width and height of the opening, and the kit instructions might tell you to subtract a small amount (e.g., 1/8 inch) to ensure a snug but operational fit.
-
Accounting for Clearance: Most screen doors need a little "wiggle room" to operate smoothly. This is called clearance. A common recommendation is to subtract about 1/4 inch from your smallest height and width measurements to allow for an 1/8 inch clearance on all sides. Always check the specific requirements for the type of door or kit you're using.
-
Checking for Squareness: A door frame that's "out of square" can make installation tricky. To check, measure diagonally from the bottom left corner to the top right corner, and then from the bottom right corner to the top left corner. If these two measurements are the same, your frame is square. If they differ significantly (e.g., by more than 1/4 inch for some retractable doors), you might need to make adjustments to the door jamb or your screen door design to compensate.
Precise measurements are absolutely vital when you're aiming for that perfect custom fit, especially if you're building a door from scratch or ordering a custom screen door kit. Taking the time to do this step carefully will save you a world of trouble later on.
Your DIY Toolkit: Essential Gear and Materials
Having the right tools and materials on hand before you start is another key to a smooth DIY experience. Scrambling to find a specific screwdriver or realizing you're out of screws mid-project is no fun! Here’s a rundown of what you’ll likely need, though the exact list will vary based on your chosen screen door project:
General Tools (Most Projects):
-
Measuring Tape: Non-negotiable for accurate measurements.
-
Level: To ensure your door is hung straight and true.
-
Screwdriver Set or Drill/Driver: For assembling frames and attaching hardware.
-
Utility Knife: For trimming screen mesh and spline.
-
Pencil: For marking cuts and placements.
-
Safety Glasses: Protect your eyes from debris!
-
Gloves: To protect your hands from cuts and splinters.
Specific Tools for Woodworking (If building a wooden frame from scratch):
-
Saw: Depending on the complexity, this could be a miter saw for precise angle cuts, a circular saw, or even a table saw for ripping boards to width.
-
Clamps: To hold pieces together while glue dries or screws are inserted.
-
Carpenter's Square: To ensure your frame corners are 90 degrees.
-
Sander (Palm or Orbital): For smoothing wood surfaces.
-
Chisel & Hammer: For tasks like creating notches for hinges.
-
Nail Gun or Stapler: For attaching screen mesh or trim.
Specific Tools for Screen Installation:
-
Spline Roller: This specialized tool has a convex wheel on one end and a concave wheel on the other, designed to press the screen mesh and then the spline into the frame's groove. It’s a small investment that makes a big difference.
Materials (will vary greatly by project):
-
Frame Material: This could be wood (like 1x2s or 2x4s), aluminum extrusions (common in kits), or vinyl components.
-
Screen Mesh: Choose from fiberglass, aluminum, pet-resistant, solar, etc.
-
Spline: The rubbery cord that holds the screen in the frame channel.
-
Hardware: Hinges, handles, latches, catches, rollers, tracks – depending on the door type.
The variety of tools listed for different projects, from basic hand tools for kit assembly to more specialized woodworking equipment for scratch builds, highlights an important aspect of DIY: using the correct tool for the job significantly impacts the ease, quality, and safety of your project. While it might be tempting to make do with what you have to save a few pennies, investing in (or borrowing/renting) the appropriate tools, like a spline roller for screen installation or a miter saw for accurate wood cuts, can prevent material damage, ensure a better fit, reduce frustration, and ultimately lead to a more professional-looking result. It also makes the process safer, as using tools incorrectly is a common cause of DIY mishaps.
Furthermore, the contrast between projects requiring an extensive arsenal of woodworking tools and those that primarily need basic assembly tools for kits illustrates that "DIY screen door" isn't a one-size-fits-all endeavor. There's a whole spectrum of involvement, catering to different skill levels, available tools, and the desire for customization. Whether you're a seasoned woodworker aiming to build a sliding screen door from raw lumber or a beginner looking to assemble a diy retractable screen kit, there's a project pathway for you. This understanding helps in selecting a project that aligns with your capabilities and ambitions, ensuring a more rewarding experience.
Let's Build! Step-by-Step DIY Screen Door Projects
Alright, planning's done, tools are gathered, and you're probably itching to get started – it's time to get your hands dirty! We'll walk through a few popular DIY screen door projects, giving you a clear idea of the steps involved. Remember to always prioritize safety and refer to any specific instructions that come with kits or materials you purchase.
How to Make a Sliding Screen Door (Covering kits and build a sliding screen door aspects)
Sliding screen doors are a fantastic addition to patios, offering easy access and fresh air without taking up swing space. Here’s how you can tackle this, whether you're using a kit or feeling more ambitious.
Option 1: Using a diy sliding screen door kit (e.g., sliding screen door frame kit)
This is often the most straightforward approach for a professional-looking result. Kits like a custom screen door kit come with most of what you need.
-
Unpack and Inspect: Before you do anything, lay out all the components and check them against the parts list provided in your kit. Make sure nothing is damaged or missing.
-
Assemble Frame: This usually involves connecting the pre-cut frame pieces (top, bottom, and side rails) using corner connectors or screws. Ensure the frame is square – you can check this by measuring the diagonals; they should be equal. Some kits may have rollers pre-installed in the top and bottom rails. Tap corners gently into place if needed, perhaps with a rubber mallet and a piece of wood to protect the frame. Crucial Tip: Many kits recommend test-fitting the assembled frame in your door opening at this stage to ensure the sizing is correct before you install the screen mesh.
-
Install Screen Mesh: Lay the assembled door frame on a flat, clean surface with the spline groove facing up. If your kit includes temporary crossbars, place them across the frame to prevent bowing. Lay the screen cloth over the frame, ensuring it overlaps the frame on all four sides. Starting at one corner, use your fingers to gently press the screen spline into the groove over the screen mesh. Then, using the concave end of your spline roller tool, slowly roll the spline into place, keeping the screen material straight and taut (but not overly tight, as this can cause the door to bow or "hourglass"). Work your way around the entire frame.
-
Trim Excess Screen: Once the spline is fully installed, use a sharp utility knife to carefully trim the excess screen cloth from around the edges of the frame. Cut away from the spline for a clean finish. Also, trim any excess spline.
-
Install Rollers and Handle: If the rollers weren't pre-installed, attach them now according to the kit instructions. Install the door handle using the screws provided.
-
Mounting the Door: This is where your new door meets its home!
-
Loosen any expander screws on the screen door if it has them; this makes maneuvering easier.
-
Carefully guide the top edge of the screen door into the top track of your doorway.
-
Lift the door slightly and set the bottom edge, with its rollers, into the bottom track. You might need to use a putty knife or a flat-head screwdriver to gently lift the rollers over the lip of the bottom track.
-
Once in place, slide the door back and forth to ensure it moves smoothly. Adjust the rollers or expanders as needed to get the right height and smooth operation. Tightening the adjustment screws usually lowers the wheels, while loosening raises them.
Option 2: Building screen door frame from scratch
This is a more advanced option, giving you full control over materials and design, perfect if you want to truly build a sliding screen door to your exact vision. You'd typically cut your wood or aluminum pieces to size, assemble the frame using appropriate joinery (which we'll discuss more in the wooden door section), and then follow similar steps for installing the screen mesh and mounting the door with a compatible track and roller system. This approach to how to make a sliding screen door allows for ultimate customization.
Creating Your Own DIY Retractable Screen (Including retractable screen wall ideas)
Retractable screens offer a sleek, modern solution, disappearing when not in use. While building one entirely from scratch is a complex undertaking, DIY kits make this project much more accessible. A diy retractable screen can transform an opening.
General Steps (based on typical kits):
-
Measure and Trim Cassette/Tracks: Accuracy is key! Measure your door opening's width. Using a hacksaw, carefully trim the screen storage cassette (the housing for the screen) and the screen itself, typically to about 1/8-inch less than the opening's width, as per kit instructions. Replace any end caps on the cassette after cutting. Similarly, measure and cut the top and bottom guide rails or side tracks to fit.
-
Install Mounting Clips/Cassette: The cassette is usually mounted at the top of the door frame (for vertically retracting screens) or to one side (for horizontally retracting screens). Attach the provided mounting clips to the door casing or frame, ensuring they are level. Then, carefully lift the storage cassette and snap or slide it into the mounting clips.
-
Install Side Tracks/Guide Rails: These are the channels the screen will run in. For a vertically retracting screen, you'll install side tracks. Measure from the sill up to the bottom of the cassette, subtract any specified amount (like 1/8-inch), and cut the aluminum side tracks. Reinstall the cassette if you removed it, then slip the side tracks into place under the ends of the cassette and secure them to the doorframe with screws. For horizontally retracting screens, you'll install top and bottom guide rails.
-
Attach Handle and Test: Secure the handle to the pull bar of the screen. Test the screen's operation. It should glide smoothly and retract properly. If it's too loose or too tight, you may need to adjust the spring tension within the cassette (follow kit instructions carefully for this). Ensure it latches securely when extended.
For those ambitious diy retractable screens for large openings or even a retractable screen wall, some kits are designed for wider expanses, or you might use multiple units side-by-side. More advanced DIYers have even crafted solutions using pulley systems or custom-built frames, though these require significant planning and skill. Some DIY retractable screen kits even come with options for motorization, adding a touch of automated convenience.
Assembling a DIY Roll-Up Patio Screen
A diy roll up patio screen is a fantastic way to enclose a porch or patio, offering flexibility and a relatively straightforward DIY project. These are often manually operated and can be simpler than full retractable systems.
General Steps (inspired by various DIY approaches):
-
Measure and Prepare Fabric/Screen: Measure the opening(s) you want to cover. Cut your screen material (and any vinyl or fabric borders for aesthetics or reinforcement) to size, allowing for hems or sleeves.
-
Create Top Attachment: A common method is to create a sleeve at the top edge of the screen panel and insert an awning rope. This rope can then slide into an awning track mounted above the opening, allowing the panel to hang neatly. Alternatively, you could use heavy-duty Velcro or snaps for a more detachable setup.
-
Create Bottom Weight/Roller: To help the screen hang straight and roll up neatly, create a sleeve at the bottom edge and insert a weight, such as a PVC pipe or a wooden dowel. PVC pipe is a good, lightweight, and weather-resistant option.
-
Install Mounting Hardware: If using an awning track, install it securely along the top of your patio or porch opening.
-
Add Securing Mechanism for Rolling Up: When you want the screen open, you'll need a way to hold it in its rolled-up position. This could be as simple as straps with buckles or Velcro, or a more involved rope and pulley system that allows you to easily hoist and secure the rolled panel. Twist-lock fasteners can be used to secure the panel at the sides when it's down.
The beauty of a diy roll up patio screen is its adaptability. You can use various materials like canvas or heavy drapery fabric if full insect screening isn't the primary goal, or if you want more weather protection.
Building a Classic Wooden Screen Door Frame (screen door frame diy, building screen door)
For the traditionalist or the ambitious DIYer, building screen door frames from wood offers timeless appeal and complete customization. This is where you can truly create a screen door frame diy masterpiece. It’s a rewarding project, perfect if you're wondering how to make a patio screen door with a classic wooden touch.
Steps (drawing from various woodworking approaches):
-
Choose Your Wood: Durability and resistance to warping are key for an exterior door. Cedar is an excellent choice due to its natural rot and insect resistance. Pine is popular, especially if you plan to paint it. Straight-grain fir is another good option. Rift-sawn or quarter-sawn white oak is very strong, stable, and decay-resistant. When buying wood, inspect boards for straightness and avoid knots, especially dead knots that can fall out.
-
Mill and Cut Lumber: Based on your door opening measurements (remembering to allow for clearance), cut your stiles (the vertical pieces) and rails (the horizontal pieces) to the required lengths and widths. If working with dimensional lumber like 2x6s, you might rip them down to your desired thickness and width (e.g., to make 1x2s or custom sizes).
-
Joinery – Connecting the Pieces: This is crucial for a strong, long-lasting door.
-
Simple & Strong: For a basic but sturdy frame, you can use butt joints reinforced with flat metal L-brackets or T-brackets at the corners and for the center brace. This method avoids complex wood joints and is quite beginner-friendly.
-
Pocket Holes: A popular DIY method involves drilling angled pocket holes into the ends of the rails and then screwing them into the stiles. This creates a strong, hidden joint.
-
Traditional Joinery (More Advanced): For superior strength and craftsmanship, consider half-lap joints, or mortise and tenon joints (where a projecting tenon on one piece fits into a mortise or slot on another). These require more skill and specialized tools but result in very durable doors. Loose tenons (like Festool Dominos) are a modern, efficient way to achieve strong mortise and tenon style joints.
-
Assemble Frame: Lay out your cut pieces on a large, flat surface (a garage floor or a purpose-built assembly table works well). Apply waterproof wood glue (like Titebond III) to all mating surfaces. Clamp the pieces together securely, ensuring the frame is perfectly square. Check for squareness by measuring the diagonals – they must be equal. Allow the glue to dry completely as per the manufacturer's instructions.
-
Add Center Brace(s): A horizontal center rail (or sometimes a diagonal brace or even a vertical one in the lower section) adds significant rigidity to the door and prevents sagging. Attach it using the same joinery method as the main frame.
-
Sand and Finish: Once the glue is dry and clamps are removed, sand the entire frame smooth, starting with coarser grit sandpaper and moving to finer grits. Then, apply a protective finish. For exterior doors, use exterior-grade paint or stain, applying multiple coats for good weather resistance. This step is crucial to protect the wood from moisture and UV damage.
-
Install Screen Mesh: With the frame built and finished, it's time for the screen.
-
Roll out your screen fabric over the frame, usually on the side where you want the screen to sit (often the "back" or interior-facing side if you're adding decorative molding on the front). Let the screen overlap the openings by a few inches.
-
Staple the screen fabric to the frame around the entire perimeter of each opening, keeping the screen taut as you work. It helps to have an assistant pull and stretch the screen while you staple. Start stapling in the middle of one side, then pull taut and staple the opposite side, then do the remaining two sides.
-
Trim the excess screen material carefully with a utility knife.
-
For a neater, more professional look, you can cover the stapled edges of the screen fabric with thin wood molding (screen molding or quarter-round), mitered at the corners and attached with small brads or a nail gun.
-
Install Hardware: Finally, attach your hinges, door handle, and latch mechanism. For hinged doors, typically three hinges are used – one near the top, one near the bottom, and one in the middle.
The different project types outlined—from assembling pre-designed kits for sliding or retractable doors to the meticulous craftsmanship of building a wooden screen door from raw lumber—naturally create varying levels of difficulty and require different skill sets. This inherent tiering means that the journey into DIY screen doors can be tailored. A novice might find great success and build confidence with a diy sliding screen door kit, which often comes with pre-cut parts and clear instructions, minimizing the chances of overwhelming frustration. Successfully completing such a project can be a stepping stone, perhaps inspiring them to later tackle a more involved custom screen door kit or even a simple scratch-built wooden frame. On the other hand, an experienced woodworker might relish the challenge and creative freedom of constructing a door with traditional mortise and tenon joints. It's important for anyone embarking on this to honestly assess their current skills, tools, and available time to choose a project that is both achievable and enjoyable.
This spectrum of complexity also ties into the degree of customization possible. While virtually all DIY screen door projects offer some level of personalization, the extent of this customization often correlates with the project's intricacy. A custom screen door kit provides valuable options for size, mesh type, and frame color, offering a good balance of personalization and manageable assembly. However, if one desires complete control over wood species, joinery techniques, unique design elements, or an unconventional size for their screen door frame diy, then building from scratch becomes the path to ultimate customization. This route, while offering unparalleled freedom, demands a greater investment in tools, skills, and time. Recognizing this trade-off helps in making an informed decision about how much customization is truly needed versus the effort one is prepared to invest. Interestingly, this also subtly underscores the convenience of simpler custom solutions, like custom-sized magnetic screen doors, which can provide a tailored fit without the high complexity of a full DIY build.
Understanding the Bones: Screen Door Frames & Mesh
A screen door is only as good as its parts! The frame provides the structure and durability, while the mesh is your frontline defender against insects and debris. Understanding the options for these key components will help you build or choose a door that not only looks great but also performs well for years to come. Let's talk about what makes up the frame and the screen itself.
Choosing Your Frame: Wood, Aluminum, or Vinyl? (sliding screen door frame kit)
The material you choose for your screen door frame impacts its appearance, durability, maintenance requirements, and cost. Here are the main players:
-
Wood:
-
Pros: Offers a classic, traditional look that can be painted or stained to match any home style. Well-built wooden frames are strong and can be repaired if damaged. Wood also has good noise-dampening qualities.
-
Cons: Susceptible to warping, rotting, or insect damage if not properly sealed and maintained. Wood frames can be heavier than other materials and may require more skill if you're building from scratch.
-
Best for: Homeowners seeking a traditional aesthetic, custom-built designs where unique shapes or wood types are desired.
-
Aluminum:
-
Pros: Lightweight yet strong and durable. Highly resistant to rust and corrosion, making it very low maintenance. It's a common material for sliding screen door frame kit components and retractable screen housings due to its stability.
-
Cons: Can dent upon impact. May not offer the same level of insulation as wood or vinyl. Aesthetic options might be more limited compared to wood.
-
Best for: Sliding screen doors, retractable screen door cassettes and tracks, modern-looking doors, and situations where low maintenance is a priority. Heavy-duty extruded aluminum frames offer excellent durability.
-
Vinyl:
-
Pros: Often the most energy-efficient option due to its good insulation properties. Very low maintenance, requiring only occasional cleaning. Resistant to moisture, insects, and fading. Can be a cost-effective choice.
-
Cons: Can become brittle and potentially crack over time, especially in extreme temperatures. Color choices might be more limited than wood, though vinyl finishes that mimic wood grain are available.
-
Best for: Situations where energy efficiency and ultra-low maintenance are top priorities.
To help you weigh these options, here’s a quick comparison:
Table 1: Screen Door Frame Material Showdown
|
Material |
Pros |
Cons |
Typical DIY Cost (Relative) |
Maintenance Level |
Best Suited For |
|
Wood |
Classic look, paintable/stainable, strong, repairable |
Can warp/rot if not maintained, heavier, more skill for scratch build |
Medium to High |
Medium to High |
Traditional aesthetics, custom builds |
|
Aluminum |
Lightweight, strong, durable, rust/corrosion resistant, low maint. |
Can dent, less insulating |
Medium |
Low |
Sliding doors, retractable housings, modern look |
|
Vinyl |
Energy efficient, low maintenance, element resistant, cost-effective |
Can become brittle, sometimes limited color options (improving) |
Low to Medium |
Low |
Low maintenance needs, good insulation |
The choice between wood, aluminum, and vinyl often involves balancing durability, aesthetics, and cost. For instance, a premium aluminum frame paired with a robust mesh will offer excellent longevity and a contemporary look but might come at a higher price point than a basic wooden frame with standard fiberglass mesh. There's rarely a single "best" option; it's about finding the material that best aligns with your specific priorities, budget, and the environmental conditions your door will face.
Picking the Perfect Mesh: Clarity, Durability, and Protection
The screen mesh itself is more than just a barrier; its material and weave affect visibility, airflow, durability, and even how well it stands up to pets or intense sunlight. Here are some common types:
-
Fiberglass Screen: This is often the standard and most affordable option. It's flexible, resists denting and creasing, and doesn't corrode or unravel easily. Fiberglass provides good airflow and decent outward visibility with minimal glare. It's a common choice for general-purpose screening.
-
Aluminum Screen: More rigid and durable than fiberglass, aluminum screen is less prone to tearing. It's rust-resistant and won't sag over time, offering a crisp, clear view.
-
Polyester Screen (often Vinyl-Coated): This type is known for its tear resistance and is generally more durable than fiberglass. It's also resistant to rust, heat, and fading, making it a good candidate for solar shades or in areas with pets.
-
Stainless Steel Screen: For maximum strength and durability, stainless steel is an excellent choice, especially for high-traffic areas or where security is a concern. It's highly resistant to corrosion and even fire, provides good ventilation, and offers great outward views.
-
Copper Screen: A strong and durable option, often chosen for its beautiful architectural accent, especially in coastal regions or on historic homes. It weathers to a distinctive patina over time.
Beyond these standard materials, there are Specialty Meshes designed for specific needs:
-
Pet Screens: If you have cats or dogs that like to scratch or lean against screens, this is a lifesaver! Pet-resistant screens are typically made from heavy-duty, vinyl-coated polyester and are significantly stronger (sometimes 7x stronger) than standard fiberglass mesh. They withstand wear and tear from pets while still keeping bugs out and letting breezes in.
-
Solar Screens (Sun Control Screens): These screens are designed to block a significant portion of the sun's heat and harmful UV rays (up to 90%) from entering your home. This helps to reduce glare, keep interiors cooler, lower energy costs, and protect furniture, carpets, and fabrics from fading.
-
No-See-Um Screens: For areas plagued by tiny insects like gnats or sandflies (often called "no-see-ums"), this tightly woven mesh (typically 20x20 mesh or finer) is essential. Usually made from fiberglass, it provides a more effective barrier against these minuscule pests.
-
Privacy Screens: While still allowing for outward visibility and airflow, some finer mesh screens (like certain solar screens) can offer a degree of privacy from the outside during the daytime.
You might also hear about Mesh Size, commonly expressed as two numbers, like 18x16. This refers to the number of strands per inch in each direction (18 strands per inch horizontally, or warp, and 16 strands per inch vertically, or fill). Standard screens are often 18x16, while no-see-um screens will have a higher count, like 20x20.
Here’s a table to help you navigate the mesh maze:
Table 2: Screen Mesh Comparison Guide
|
Mesh Type |
Key Features |
Pros |
Cons |
Relative Cost |
|
Fiberglass |
Standard, flexible, affordable |
Good airflow & visibility, resists dents/creasing, no corrosion |
Less durable than other types |
Low |
|
Aluminum |
Durable, rigid, clear view |
Won't sag, rust-resistant, good durability |
Can dent, may corrode in salt air if not coated |
Medium |
|
Polyester |
Tear-resistant, more durable than fiberglass |
Rust, heat, fade, pet resistant; good for solar shades |
Can be pricier than fiberglass |
Medium |
|
Pet Screen |
Heavy-duty, withstands pet damage (e.g., 7x stronger than fiberglass) |
Excellent durability against claws/scratching, good visibility |
Higher cost, might slightly reduce airflow/visibility |
High |
|
Solar Screen |
Blocks UV rays, reduces heat/glare |
Lowers energy costs, protects furnishings, daytime privacy |
Can reduce some natural light, higher cost |
High |
|
No-See-Um |
Tightly woven (e.g., 20x20 mesh) for tiny insects |
Best protection against very small pests |
May slightly reduce airflow/visibility more than standard |
Medium-High |
|
Stainless Steel |
Very strong, corrosion/fire resistant |
Excellent durability, good for high traffic/security, clear view |
Highest cost, can be harder to work with |
Very High |
Making an informed choice about your screen mesh from the outset can save a lot of headaches down the line. For example, if you share your home with enthusiastic pets, investing in a pet screen initially is a proactive step that prevents the frustration and repeated cost of replacing torn standard fiberglass screens. Similarly, if your patio bakes in the afternoon sun, a solar screen can make the space more comfortable and protect your outdoor furniture. This kind of forward-thinking in material selection means a slightly higher upfront investment can often lead to greater long-term satisfaction and even savings.
Making it Easy: Custom Kits and Replacements
Not everyone has the time, tools, or inclination to build a screen door entirely from scratch, and that's perfectly okay! Sometimes, you just need a straightforward solution for a custom-sized opening or a quick fix for a damaged screen. That's where the convenience of custom kits and replacement parts truly shines.
The Magic of Custom Screen Door Kits
We've touched on custom screen door kit options before, but they deserve a special mention because they beautifully bridge the gap between off-the-shelf limitations and full-blown scratch builds. These kits are a fantastic way to get a door that's tailored to your specific dimensions, and often you can choose your preferred frame materials, colors, and mesh types too.
The real beauty of these kits is that they offer a significant degree of customization without demanding advanced woodworking or metalworking skills. The components typically arrive pre-cut or designed for easy assembly, with clear instructions to guide you through the process. This makes achieving a professional-looking, perfectly fitting screen door much more accessible to the average DIYer. When ordering, always double-check your measurements, inquire about material quality, ensure all necessary hardware is included, and look for kits with well-written instructions. This approach can be particularly valuable for those non-standard openings where finding a ready-made solution is a nightmare. It subtly reinforces the idea that "custom sizes" are a desirable and achievable feature, even in more involved DIY projects.
For individuals who might be hesitant to dive into a complex DIY project, these kits serve as an excellent and accessible entry point. The fear of making a costly mistake or ending up with a poorly fitting door can be a significant barrier. Kits help to lower this barrier by providing pre-engineered components and a structured assembly process. Successfully completing a kit-based project, whether it's a full door or just a screen replacement, can be a real confidence booster, perhaps encouraging someone to explore more ambitious DIY endeavors in the future.
Quick Fix: Using a Sliding Screen Door Screen Replacement Kit
Got an existing sliding screen door where the frame is still in good shape, but the mesh is torn, ripped, or looking worse for wear? A sliding screen door screen replacement kit is your best friend! This is a common issue, often caused by pets, accidental pokes, or just general wear and tear over time.
These kits typically provide you with a new roll of screen mesh, a new length of spline, and sometimes even a basic spline roller tool – everything you need to give your door a new lease on life. The process is generally quite simple:
-
Remove Old Screen and Spline: Carefully lay your door on a flat surface. Using a small screwdriver or an awl, pry out one end of the old spline from its groove in the frame. Once started, it should pull out relatively easily. Remove the old, damaged screen mesh. Clean out any dirt or debris from the spline groove.
-
Cut New Screen: Lay your new screen mesh over the door frame, ensuring it overlaps the spline groove by at least an inch or two on all sides. You can use clamps to hold it in place temporarily. Cut the mesh to this oversized shape.
-
Install New Screen and Spline: Starting at one corner, use the convex (rounded) wheel of your spline roller to gently press the screen mesh into the groove. Then, take your new spline and, using the concave (grooved) wheel of the spline roller, press the spline firmly into the groove over the screen mesh. Work your way down one side, keeping the screen taut (but not so tight that it distorts the frame). Repeat on the opposite side, again pulling the screen taut, and then finish the remaining two sides.
-
Trim Excess Screen: Once the spline is fully installed all the way around, use a sharp utility knife to carefully trim off the excess screen mesh. Cut along the outside edge of the spline for a neat finish.
This kind of repair not only saves you money compared to replacing the entire door but also promotes a more sustainable approach. Fixing what's broken rather than discarding the whole unit is an environmentally conscious choice that aligns with a growing interest in repairability and reducing waste. The availability of these replacement kits empowers homeowners to extend the life of their existing fixtures cost-effectively.
Safety First! Key Precautions for Your DIY Endeavor
Your safety is absolutely paramount! DIY projects are a fantastic way to improve your home and learn new skills, but it's crucial to make sure it's safe fun. A moment of carelessness can lead to an injury that takes all the joy out of your accomplishment. So, before you start any work, let's review some key safety precautions.
-
Wear Proper Personal Protective Equipment (PPE): This is non-negotiable.
-
Safety Glasses or Goggles: Protect your eyes from flying debris, dust, wood chips, or broken screen material. This is essential for almost every step.
-
Gloves: Sturdy work gloves will protect your hands from cuts, scrapes, splinters, and exposure to any chemicals if you're painting or staining.
-
Ear Protection: If you're using power tools like saws or drills, wear earplugs or earmuffs. Prolonged exposure to loud noise can cause permanent hearing damage.
-
Dust Mask: When cutting wood, sanding, or dealing with fine particles, a dust mask will prevent you from inhaling them.
-
Maintain a Safe Workspace: A clean, organized workspace is a safe workspace.
-
Ensure you have adequate lighting so you can see clearly what you're doing.
-
Make sure there's enough room to work comfortably and maneuver materials without tripping.
-
Keep the area clutter-free. Regularly clear away tools, scraps, sawdust, and debris to avoid slips and trips.
-
Keep children and pets away from the work area to prevent accidents.
-
Tool Safety is Crucial:
-
Inspect tools before each use for any damage, missing guards, or other issues.
-
Always use tools for their intended purpose. Don't try to make a tool do something it wasn't designed for.
-
Keep cutting blades sharp. Dull blades require more force, making them more dangerous and more likely to slip.
-
Handle power tools with caution and respect. Never rush. Keep your hands and fingers away from moving parts. Read and understand the tool's manual.
-
Ladder Safety (If Applicable): If your project requires working at height:
-
Follow the "Rule of Four": For every four feet of ladder height, place the base one foot away from the wall.
-
Ensure the ladder is on a stable, level surface.
-
Maintain three points of contact (two feet and one hand, or one foot and two hands) when climbing or working.
-
Electrical Safety (If dealing with motorized options or working near electrical outlets):
-
Turn off the main power breaker to the circuit you're working near. Clearly communicate this to others in the household.
-
Use insulated tools and consider rubber gloves for an extra layer of protection.
-
Avoid using metal ladders when working with or near electricity; opt for fiberglass ladders.
-
Read Instructions Carefully: This applies to kits, tools, and any materials you're using. Manufacturer's instructions contain vital safety information and operational guidance.
-
Know Your Limits: Be honest about your skill level and comfort with certain tasks. If a part of the project feels too complex, too heavy, or potentially dangerous, don't hesitate to ask for help from a more experienced friend or consider hiring a professional for that specific step.
These safety measures aren't meant to slow you down; they're there to ensure your DIY experience is positive and injury-free. An accident can quickly turn a rewarding project into a costly and painful one, derailing your progress and diminishing that wonderful sense of accomplishment. Think of safety not as a hurdle, but as a foundational element that enables you to successfully and enjoyably complete your DIY screen door. Investing a few extra minutes in safety precautions is, in reality, a smart way to save time and potential expense in the long run.
Keeping it Smooth: Troubleshooting & Maintaining Your DIY Screen Door
Congratulations! You've planned, built, and installed your DIY screen door. But like any well-used part of your home, it might need a little TLC down the road to keep it functioning perfectly. Even the best DIY projects can encounter a few hiccups. Here’s how to keep your screen door in top shape and tackle some common issues.
Common Issues & Solutions:
-
Sticking or Hard-to-Slide Door (Common with Sliding or Retractable Types):
-
Cause: Often dirt, debris in the track, worn-out rollers, or misalignment.
-
Solution:
-
Clean the Tracks: Use a vacuum cleaner with a crevice tool or a stiff brush to thoroughly remove any dirt, pet hair, leaves, or other obstructions from the top and bottom tracks.
-
Lubricate Tracks and Rollers: Apply a silicone-based lubricant spray to the tracks and rollers. Avoid oil-based lubricants as they can attract more dirt and grime.
-
Check/Adjust/Replace Rollers: Inspect the rollers for wear, cracks, or damage. If they look worn, replacing them is usually straightforward. Many sliding screen doors have adjustment screws near the rollers; turning these can raise or lower the door for smoother operation.
-
Torn or Damaged Screen Mesh:
-
Cause: Pets, accidental impacts, sharp objects, or general wear and tear.
-
Solution:
-
Small Tears/Holes: For minor damage, you can often use a screen patch kit, which usually involves an adhesive patch or a small piece of screen that can be "sewn" or glued on.
-
Large Tears or Extensive Damage: It's usually best to replace the entire screen mesh. This process is similar to installing a screen in a new frame or using a screen replacement kit, as described earlier.
-
Bent Frame (Minor):
-
Cause: Accidental impacts or rough handling.
-
Solution: For minor bends in an aluminum frame, you might be able to gently bend it back into shape using smooth-jawed pliers or by carefully applying pressure. For severely damaged frames, replacement of the frame or the entire door might be necessary.
-
Door Misalignment (Not closing properly, gaps appearing):
-
Cause: House settling, worn rollers/hinges, or improper initial installation.
-
Solution:
-
Sliding Doors: Adjust the rollers to ensure the door is level and sitting correctly in the tracks.
-
Hinged Doors: Check the hinges. They might be loose and need tightening. If the door sags, you might need to shim the hinges or, in some cases, reposition them.
-
All Types: Ensure the track (for sliding/retractable) is level and not damaged. Sometimes, the entire door frame might need slight adjustment by loosening the mounting screws, repositioning, and re-tightening.
-
Retractable Screen Won't Retract or Comes Out of Tracks:
-
Cause: Obstructions in the tracks, incorrect tension, misaligned tracks.
-
Solution: Check the tracks for any debris. Ensure the side tracks are correctly aligned and secured. You may need to adjust the screen tension according to the manufacturer's instructions.
-
Locking Mechanism Problems:
-
Cause: Wear and tear, loose screws, misalignment.
-
Solution: Try lubricating the lock mechanism. Check for and tighten any loose screws. If the lock is broken or severely worn, you may need to replace it.
General Maintenance Tips for Longevity:
-
Regular Cleaning: Periodically wipe down the screen mesh with a soft brush or cloth and mild soap and water to remove dust, pollen, and grime. Clean the frame as well.
-
Track Maintenance (for sliding/retractable): Keep the tracks clean and free of debris. Regular vacuuming is a good habit.
-
Inspect Hardware: Occasionally check hinges, handles, latches, and rollers. Tighten any loose screws.
-
Wood Door Care: For wooden screen doors, inspect the paint or finish annually and touch up as needed to protect the wood from moisture and UV damage.
-
Winter Storage (if applicable): If you have removable screen panels or a type of screen door that won't be used in winter, consider removing and storing it in a safe, dry place to protect it from harsh weather and extend its life.
Taking on the troubleshooting and maintenance of your DIY screen door is really an extension of the whole DIY spirit. The ability to diagnose and fix common issues not only saves you money on potential repair calls but also deepens that sense of ownership and accomplishment. It reinforces the skills you've learned and keeps your creation functioning beautifully. Interestingly, many of the common problems, like misalignment or sticking doors, can often be traced back to the initial installation process. If measurements weren't spot-on, or if a frame wasn't installed perfectly level, issues are more likely to arise later. This highlights how meticulous attention to detail during the building and installation phases is a proactive way to minimize future maintenance headaches and ensure your DIY screen door operates smoothly for years to come.
Conclusion: Enjoy the Breeze and Your Handiwork!
And there you have it – your comprehensive guide to the world of DIY screen doors! We've journeyed from understanding the fantastic benefits – the fresh air, the bug-free living, the sheer satisfaction of creating something custom – all the way through planning, building, and maintaining your very own screen door. Whether you opt for a simple kit or decide to build a classic wooden frame from scratch, the power to transform your doorway and enhance your home is truly in your hands.
Remember, a DIY screen door is more than just a project; it's an investment in your comfort, your home's appeal, and your own skills. Each time you feel that gentle breeze without the buzz of a mosquito, you'll get a little reminder of what you accomplished.
So, now that you're equipped with the know-how, you're ready to tackle this rewarding project. And hey, if you're looking for a super convenient, custom-fit solution, especially for those uniquely sized or tricky openings where a traditional DIY might seem daunting, don't forget to explore all the options out there, including innovative solutions like magnetic screen doors that can be tailored precisely to your needs.
Happy building, and may your home be filled with fresh air and the sweet satisfaction of a job well done!
FAQs: Your Top DIY Screen Door Questions Answered
1: What's the easiest type of screen door to DIY for a beginner?
For absolute beginners, a magnetic screen curtain is incredibly simple to install, often requiring no tools. If you're looking for a framed option, hanging a pre-made hinged screen door that just needs hinges attached is quite straightforward. For building something, a very basic wooden frame using 1x2 lumber and simple L-brackets for joinery is a good starting point, or a diy sliding screen door kit that comes with comprehensive, easy-to-follow instructions.
2: How long does it take to build a DIY screen door?
This can vary wildly depending on the complexity of the project and your skill level. Installing a simple magnetic screen might take less than 30 minutes. Assembling a diy sliding screen door kit or a basic wooden frame might take a few hours to half a day. Building a more intricate wooden screen door from scratch, involving more complex joinery and finishing, could easily be a weekend project or longer, with estimates around 6 or more hours of active and prep time.
3: Can I make a DIY screen door for French doors or other large openings?
Absolutely! This is a common need. DIY retractable screens for large openings are an excellent solution, and many kits are available specifically for double doors or wider patio openings. You could also opt to build two custom hinged wooden screen doors to meet in the middle. Bi-fold screen systems are another alternative for large spans. The key is accurate measurement and choosing a system or design suited for the width.
4: What's the best way to keep my DIY screen door screen tight?
The trick is in the installation technique. When you're installing the screen mesh into the frame with spline, always pull the screen material taut – but not so tight that it bows or distorts the frame. A good method is to start installing the spline in the middle of one side, then move to the opposite side, pull the screen gently taut, and install the spline there. Then do the remaining two sides, always maintaining gentle, even tension. For wooden frames, some DIYers even build their frames with slightly bowed boards (bowing outwards) which then naturally help to keep the screen tight once it's stapled on and the frame is straightened during installation.
5: My door opening isn't a standard size. Is DIY still an option?
Yes, and this is precisely where DIY truly shines! If you have a non-standard opening, building your own screen door frame diy from wood allows you to customize it to the exact dimensions required. Alternatively, many companies offer a custom screen door kit where you provide your specific measurements, and they create a kit tailored to your opening. This ability to achieve a perfect fit for unique spaces is one of the biggest advantages of taking the DIY route.