
Clear Views & Fresh Air: Your Comprehensive Guide to Make Your Own Screen Windows
Y.Walter
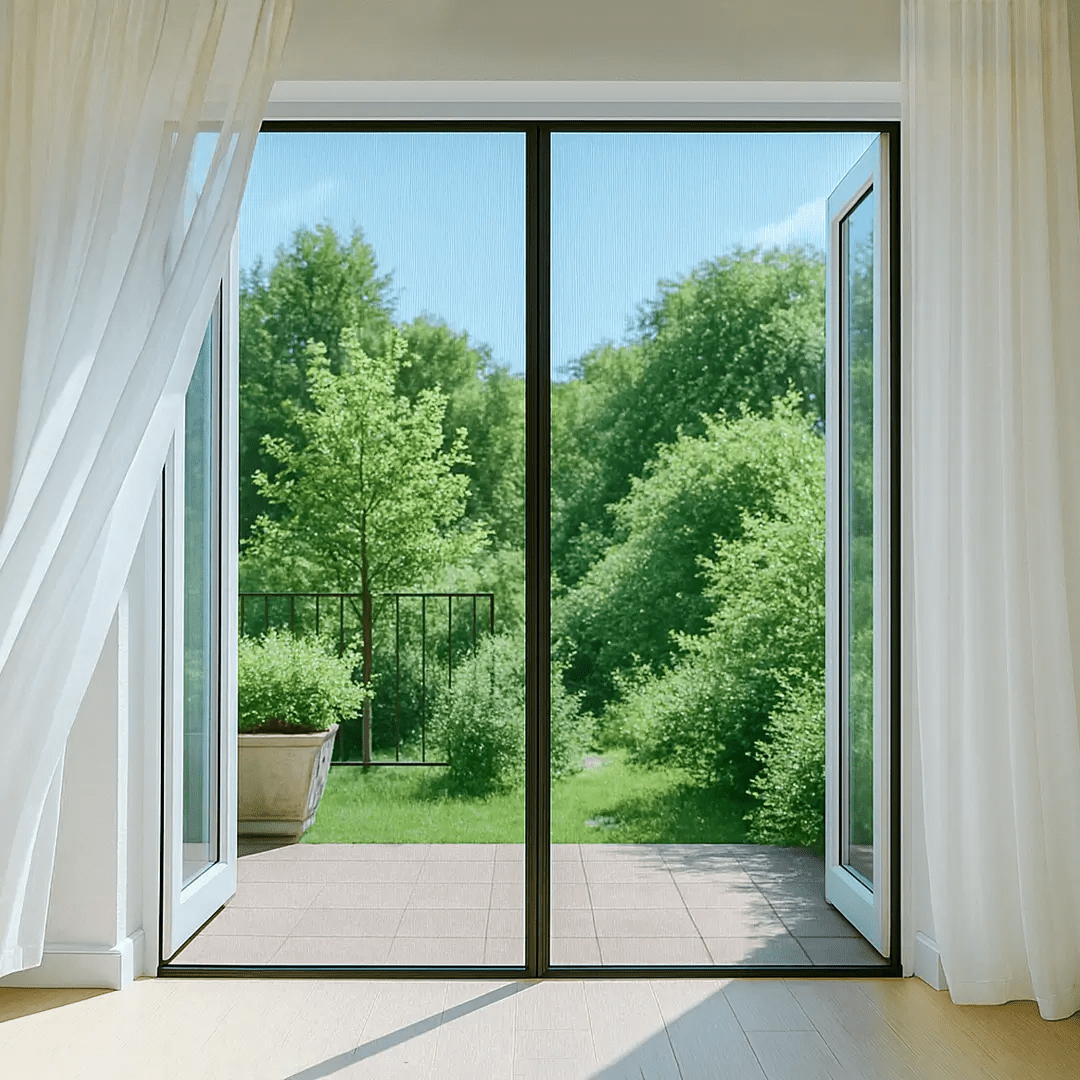
There’s a unique satisfaction in enhancing your home with your own two hands. If you're looking to welcome in those refreshing breezes while keeping insects out, learning to make your own screen windows is a rewarding and practical DIY project. Whether you're replacing old, damaged screens, outfitting windows that never had them, or tackling uniquely shaped openings, creating DIY screens for windows can save you money and give you a final product tailored perfectly to your needs.
Many homeowners are surprised to learn that making screens for windows isn't as daunting as it might seem, especially with the availability of user-friendly materials and kits. From crafting custom size window screens that fit like a glove to opting for a convenient custom window screen kit, or even building sturdy custom aluminum window screens, this guide will walk you through the process. We'll cover the materials, tools, and steps involved, empowering you to achieve professional-looking results and enjoy the benefits of clear views and pest-free ventilation.
Why Embark on a DIY Window Screen Project?
The reasons for choosing to make your own screens for windows are plentiful:
- Cost Savings: Often, making your own can be significantly cheaper than purchasing pre-made custom screens, especially if you have multiple windows or non-standard sizes.
- Perfect Custom Fit: This is a huge advantage. You can create custom size window screens that fit your window openings precisely, eliminating gaps that off-the-shelf standard sizes might leave.
- Material Choice: You get to select the quality and type of frame material and screen mesh that best suits your needs and budget – perhaps you want durable aluminum frames or specialized pet-resistant mesh.
- Repair and Replacement Ease: Once you know how to make them, repairing a damaged screen in the future becomes a much simpler and less expensive task.
- Accommodating Unique Windows: Older homes or custom-built houses often have windows that aren't standard dimensions. DIY is sometimes the only way to get a perfect fit without a hefty custom order bill.
- Sense of Accomplishment: There’s nothing like stepping back and admiring a well-done project you completed yourself.
Understanding the Anatomy of a Window Screen
Before you start making screens for windows, it's helpful to understand the basic components:
- Frame: This is the rigid structure that holds the screen mesh. It's typically made from aluminum or wood. For DIYers, aluminum frame kits are very popular.
- Screen Mesh: The fabric that provides the barrier against insects. Common types include fiberglass (standard, affordable), aluminum (more rigid, durable), pet screen (extra tough), and solar screen (reduces heat/glare).
- Spline: A flexible vinyl or rubber cord that is pressed into a channel (spline groove) in the frame to hold the screen mesh securely in place.
- Corner Connectors/Corners: Small pieces (usually plastic or metal) that join the lengths of frame material at the corners to create the rectangular (or other shaped) frame.
- Hardware (Optional): Depending on your window type, you might need pull tabs, springs, or latches to hold the screen in the window channel or make it easy to remove.
Choosing Your Materials: The Foundation of Good DIY Screens for Windows
The quality of your materials will directly impact the look and longevity of your homemade screens.
Frame Materials
-
Aluminum: This is the most popular choice for DIY screens for windows, especially when using kits.
- Pros: Lightweight, strong, durable, rust-proof, relatively easy to cut and assemble with kits. Custom aluminum window screens look clean and professional.
- Cons: Can be bent if mishandled; requires specific corner connectors.
-
Wood: Offers a classic, traditional look.
- Pros: Can be made to match existing wooden window frames, can be painted or stained, offers good rigidity.
- Cons: Requires more woodworking skills to create strong joints, susceptible to rot or warping if not properly sealed and maintained, can be heavier.
Screen Mesh Types
- Fiberglass Screen: Most common, affordable, flexible, easy to work with, doesn't crease or dent easily. Comes in charcoal and grey.
- Aluminum Screen: More rigid and durable than fiberglass, good visibility. Can dent or crease if not handled carefully.
- Pet Screen: Made from extra-strong vinyl-coated polyester. Highly resistant to tears and punctures from pet claws. A great choice if you have cats or dogs.
- Solar Screen: Designed to block a significant portion of solar heat and UV rays, helping to keep rooms cooler and reduce fading of furnishings. Mesh is usually denser, which can slightly reduce visibility and airflow.
- No-See-Um Screen: Features a very fine mesh to keep out even the tiniest insects like gnats and midges. Can reduce airflow more than standard mesh.
Spline
Spline comes in various diameters. You'll need to choose a spline size that fits snugly into the channel of your chosen frame material to hold the mesh securely. It’s often sold by diameter (e.g., .125", .140").
Corner Connectors
For aluminum frames, these are essential. They are typically plastic or metal and slide into the hollow ends of the frame pieces, allowing you to create a 90-degree corner. Ensure they match the profile of your aluminum frame stock.
Tools You'll Need for Making Screens for Windows
The tools required will depend slightly on whether you're using a kit or building from scratch, and your chosen frame material.
For Aluminum Frame Kits / Custom Aluminum Window Screens:
- Measuring Tape: Essential for accuracy.
- Hacksaw (or Miter Saw with fine-tooth blade for metal): For cutting aluminum frame pieces to length (if not pre-cut in your kit).
- File: To smooth any rough edges after cutting aluminum.
- Screen Spline Roller Tool: A small wheel on a handle used to press the spline (and mesh) into the frame's channel. This is a must-have.
- Utility Knife or Sharp Craft Knife: For trimming excess screen mesh.
- Rubber Mallet: Sometimes useful for tapping corner connectors into aluminum frame pieces.
- Safety Glasses and Gloves.
For Wooden Frames (from scratch):
- Measuring Tape.
- Pencil.
- Hand Saw or Power Saw (Miter Saw recommended for accurate angles).
- Wood Glue and Clamps.
- Drill (for pilot holes if using screws).
- Screwdriver or Nail Gun/Hammer.
- Sandpaper.
- Paint or Wood Sealer & Brushes.
- Spline Roller Tool and Spline (if creating a spline groove) OR Heavy-Duty Staple Gun (if stapling mesh directly to wood).
- Utility Knife.
- Safety Glasses and Gloves.
A custom window screen kit will usually provide the frame stock, corner connectors, spline, and pull tabs, but you'll still need tools for cutting (if necessary) and assembly.
Step-by-Step Guide 1: Using a Custom Window Screen Kit (Aluminum Frames)
This is often the easiest way to make your own screens for windows with a professional look. These kits allow you to create custom size window screens.
1. Measure Your Window Opening Precisely
- Measure the exact width and height of the window opening where the screen will sit. For most windows, this is inside the channel or lip designed to hold the screen.
- Measure width at the top, middle, and bottom. Use the smallest measurement.
- Measure height on the left, right, and center. Use the smallest measurement.
- Most kits will require you to deduct a certain amount from these measurements to account for the frame thickness and corner connectors (e.g., deduct 1.5 inches from both width and height). Always follow the specific instructions provided with your kit for calculating frame piece lengths.
2. Purchase the Right Kit and Mesh
- Kits come in various lengths of frame stock and different colors (e.g., white, bronze, silver). Choose enough material for all your windows.
- Purchase your desired screen mesh and spline separately if not included or if you want a specific type (like pet screen). Ensure the spline diameter is correct for your frame kit.
3. Cut Aluminum Frame Pieces (If Necessary)
- If your custom window screen kit doesn't come with pre-cut pieces to your final calculated lengths, you'll need to cut them.
- Using your hacksaw (or miter saw), carefully cut the four frame pieces to the lengths determined in Step 1 (after deductions). Ensure cuts are straight and square (90 degrees).
- Gently file any rough edges.
4. Assemble the Frame
- Take two perpendicular frame pieces and insert a corner connector into the hollow ends of each.
- Push them together firmly to form a corner. A rubber mallet can be used to gently tap them fully seated if needed.
- Repeat for all four corners until you have a rectangular frame. Double-check that it's square by measuring the diagonals – they should be equal.
5. Install the Screen Mesh and Spline
This is where the spline roller tool is essential.
- Lay the assembled aluminum frame on a flat, clean surface with the spline groove facing up.
- Unroll your screen mesh and lay it over the frame, ensuring it overlaps the frame by at least an inch on all sides. Keep it smooth and wrinkle-free.
- First Side: Starting at one corner, use the convex wheel of your spline roller to gently press the mesh into the spline groove for a few inches. Then, use the concave wheel to press the spline into the groove over the mesh, seating it firmly. Continue down the entire first side, keeping the mesh straight but not overly taut yet.
- Second Adjacent Side: Move to an adjacent side. Pull the mesh gently taut (but not so tight it bows the frame) and repeat the process of rolling in the mesh and then the spline.
- Third Side: Now, pull the mesh more firmly taut across the frame from the already splined side and install the spline on this third side. This is where you create the main tension.
- Fourth Side: Pull the mesh taut from the remaining unsplined side, ensuring there are no wrinkles. Roll in the mesh and spline on this final side. The mesh should now be tight and smooth across the frame.
- It takes a bit of practice to get the tension right. Too loose, and it will sag; too tight, and it can bow the frame inward.
6. Trim Excess Mesh
- Using your sharp utility knife, carefully trim the excess screen mesh from the outside edge of the spline. Angle the knife away from the newly installed spline to avoid accidentally cutting it.
7. Add Pull Tabs/Hardware
- Most kits come with small pull tabs. These usually slip under the spline on one or two sides before the spline is fully seated, or they might have small prongs that push into the spline groove. They make removing the screen from the window easier. Install them according to your kit's instructions.
Step-by-Step Guide 2: Building Wooden Window Screens from Scratch
If you prefer a traditional look or have woodworking skills, making screens for windows with wooden frames is a great option.
1. Choose Your Wood and Measure
- Select a straight, durable wood suitable for outdoor use if it will be exposed (e.g., cedar, pine, fir). Common stock sizes are 1x2 or 5/4x2.
- Measure your window openings carefully, as described previously. You'll need to decide on the construction method for your corners (e.g., butt joints, half-lap joints) as this will affect your cut list.
2. Cut and Assemble the Frame
- Cut your four frame pieces to size, ensuring square ends.
- Join the corners. Half-lap joints are strong and look good but require more skill. Butt joints reinforced with corrugated fasteners, dowels, or corner brackets are simpler. Use wood glue and clamps for all joints.
- Ensure the frame is perfectly square by measuring diagonals. Adjust as needed before the glue sets.
3. Prepare for Mesh Installation
- If you plan to use spline, you'll need to rout a spline groove around the inside perimeter of the frame.
- Alternatively, you can staple the mesh directly to the back of the wooden frame.
4. Paint or Seal the Wood
- Once assembled and sanded, paint or seal the wooden frame with a good quality exterior-grade finish to protect it from moisture and sun. Do this before installing the mesh.
5. Install the Mesh
- Spline Method: Lay the mesh over the frame (groove side up), and use a spline roller to install the mesh and spline as described for aluminum frames.
- Staple Method: Lay the mesh over the back of the frame. Pull it taut and use a heavy-duty staple gun to attach it to the wood, placing staples every 1-2 inches. Start on one side, then the opposite, then the remaining two, always pulling the mesh taut. Trim excess mesh. You can then add thin wooden screen molding around the edges over the staples for a cleaner look.
Tips for a Professional Finish on Your DIY Screens for Windows</h2>
- Measure Twice, Cut Once: This old adage is critical for DIY screens.
- Keep it Square: Ensure your frames are perfectly square for a good fit and appearance.
- Proper Mesh Tension: Practice on a scrap piece if needed. The mesh should be taut like a drum, but not so tight it bows the frame.
- Clean Cuts: Use sharp blades for both frame material and mesh.
- Don't Rush: Take your time, especially with installing the spline.
When DIY Might Not Be the Best Option
While making custom made window screens yourself is rewarding, there are times when it might be better to buy pre-made custom screens or hire a professional:
- Very Large or Unusually Shaped Windows: These can be very challenging to DIY well.
- Lack of Tools or Experience: If you don't have the tools or are uncomfortable with the steps involved.
- Time Constraints: DIY screen building can be time-consuming.
- High Number of Screens: If you need to make many screens, the time investment might be too great.
In these cases, ordering custom-made screens (either from a local shop or online) or using a custom window screen kit where pieces might be pre-cut can be good alternatives.
Beyond Windows: Thinking About Other Screened Openings
Now that you've mastered how to make your own screen windows, you might be looking at other areas of your home, like doorways, that could benefit from screening. While window screen construction involves building or assembling frames and stretching mesh, screening doorways, especially with modern solutions, can sometimes be even simpler.
For instance, if you're considering adding a screen to a patio door or front door, custom-fit magnetic screen doors, like those from Coverwith, offer a different kind of DIY-friendly experience. These come as complete, perfectly sized units. There’s no frame building or mesh stretching involved in their installation; you simply prepare your door frame and attach the screen using high-quality adhesive fasteners. It’s a testament to how custom solutions can simplify home improvements, ensuring a perfect fit with minimal fuss – a principle that’s valuable whether you’re tackling windows or doors.
Conclusion: Enjoy the Breeze and the Satisfaction of DIY Screen Windows
Learning to make your own screen windows is a valuable skill that empowers you to create custom solutions for your home, save money, and enjoy the satisfaction of a job well done. Whether you choose the convenience of a custom window screen kit for building custom aluminum window screens or opt for the traditional craft of wooden frames, the result is the same: fresh air, no bugs, and clear views.
By carefully measuring, choosing quality materials, and taking your time with the assembly, your DIY screens for windows will provide years of service, making your home more comfortable and enjoyable. And who knows, mastering making screens for windows might just be the start of many more successful home improvement projects!
Tackling Other Screening Projects?
Great job on learning about DIY window screens! If you're looking to bring fresh air into other parts of your home and are considering how to approach attaching a screen door to your front entry, patio, or other doorways, our comprehensive pillar page is filled with expert tips and installation guides for various door types.
[Explore All Screen Door Installation Methods]
Frequently Asked Questions About Making Your Own Window Screens
What is the easiest way to make your own screens for windows if I'm a beginner?
Using a custom window screen kit with pre-cut aluminum frame pieces or easily cuttable aluminum stock and corner connectors is generally the easiest method for beginners. The process mainly involves assembling the frame and then rolling in the screen mesh and spline.
How do I get custom size window screens without ordering expensive pre-made ones?
By making them yourself! Whether you use an aluminum frame kit or build wooden frames, you cut the frame pieces to the exact dimensions needed for your specific window openings. This DIY approach is the core of creating affordable custom size window screens.
What's the best mesh to use when making screens for windows if I have pets?
If you have pets, definitely use "pet screen" mesh. This is a heavy-duty, vinyl-coated polyester material that is much more resistant to tears and punctures from claws than standard fiberglass or aluminum mesh.
Can I use a custom window screen kit to make a custom aluminum window screens for an odd-shaped window?
Most standard kits are designed for rectangular windows. For truly odd shapes (like an octagon or trapezoid), a kit might not work directly. You might need to custom cut aluminum stock and potentially fabricate or find specialized corner connectors, or consider a professional service for such complex shapes.
How much money can I realistically save by making DIY screens for windows?
Savings can be significant, often 50% or more compared to professionally made custom screens, especially if you have many windows or non-standard sizes. The main costs will be the frame material (kits or stock), mesh, spline, and any necessary tools if you don't already own them.