
Breeze Through Setup: Your Ultimate Guide to Magnetic Screen Door Installation
Y.Walter
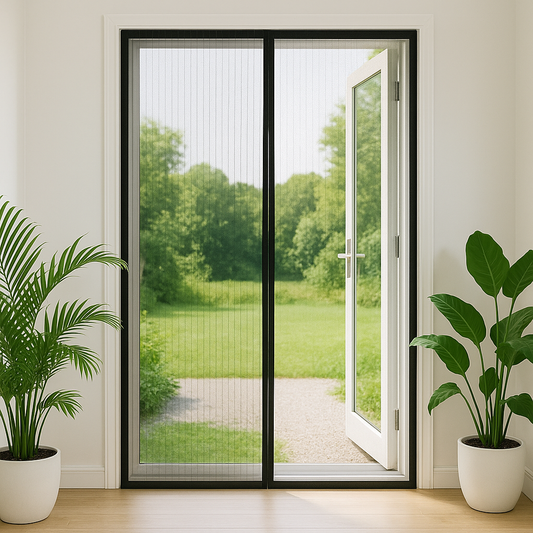
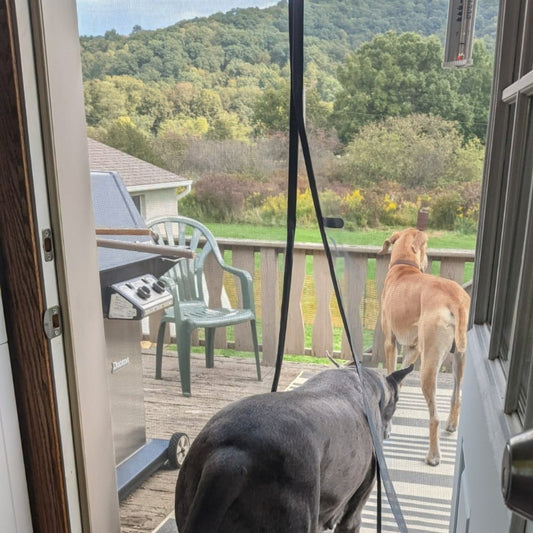
The allure of a magnetic screen door is undeniable: fresh air flowing through your home, easy hands-free access for kids and pets, and a simple barrier against pesky insects. These ingenious screens have become incredibly popular, and a big part of their appeal lies in their straightforward installation process. If you've just purchased one, or are considering it, you're likely wondering about magnetic screen door installation and just how easy it really is.
Whether you're looking to install a screen on a standard hinged door, figuring out how to install magnetic screen door on sliding door openings, or even tackling what some call a "magic mesh installation," the good news is that most of these systems are designed with the DIYer in mind. This guide will walk you through the typical steps, offer tips for a smooth setup, and highlight how a custom-fit magnetic screen door can make the process even more foolproof. We'll also clarify how installing a complete magnetic screen unit differs from the more traditional task of learning how to install screen door mesh into an existing frame, showcasing the simplicity of modern magnetic solutions.
Why Choose a Magnetic Screen Door? The Installation Advantage
Before we get into the nuts and bolts of magnetic mesh screen door installation, let's quickly recap why so many homeowners love them, especially from an installation perspective:
- Typically No Tools Required (or Minimal): Most magnetic screen doors, particularly quality ones like those from Coverwith, are designed for a tool-free installation using strong adhesive hook-and-loop fasteners (like Velcro). Some kits might include optional thumbtacks for wooden frames, but drilling is rarely needed.
- Fast and Easy Setup: Unlike traditional screen doors that require hardware, hinges, or tracks, a magnetic screen can often be installed in under 30 minutes.
- Damage-Free Installation: Because they usually rely on adhesives, there's no need to drill holes into your door frame, making them perfect for renters or anyone hesitant to make permanent alterations.
- Versatile Application: They can be fitted to various door types, including single doors, French doors, and, with the right approach, even serve as an excellent screen solution for sliding glass door openings.
These benefits make the installation process far less intimidating than many other home improvement projects.
Understanding Your Magnetic Screen Door Kit
Most magnetic screen door kits will come with similar components:
- The Screen Panels: Usually one or two panels of durable mesh with magnets sewn into the reinforced center edges. Quality screens will have all edges neatly bound.
- Attachment Strips: Rolls of adhesive-backed hook-and-loop fastener (one side will be on the screen, the other you'll apply to your door frame).
- Optional Reinforcement: Sometimes, a pack of thumbtacks or push pins is included for extra security on wooden door frames.
- Instructions: A step-by-step guide from the manufacturer.
Familiarize yourself with these parts before you begin. If you've purchased a custom-sized screen door, like from Coverwith, the screen panels will already be perfectly sized for your specific door opening, which significantly simplifies the process and ensures a better final fit.
Pre-Installation Steps: Paving the Way for a Perfect Fit
A little prep work goes a long way in ensuring your magnetic screen door installation is smooth and successful.
1. Accurate Measurements (If You Haven't Already Purchased Custom)
If you bought an off-the-shelf standard size magnetic screen, you should have already measured your door opening (inside frame to inside frame for width, and from the top of the frame to the threshold for height) to ensure you have the closest possible fit.
- For Coverwith Custom-Fit Screens: This step is done before ordering. You provide Coverwith with your precise door frame dimensions where the screen will attach. This means when your screen arrives, it's already perfectly sized, eliminating guesswork and the risk of a poor fit that can plague standard-sized generic magnetic screens.
2. Thoroughly Clean Your Door Frame
This is arguably the MOST critical step for a lasting adhesive installation. The surface where you'll apply the adhesive hook-and-loop strips must be impeccably clean and dry.
- Use a good household cleaner or rubbing alcohol to remove all dust, grease, grime, and any old adhesive residue from the door frame.
- Allow the frame to dry completely before proceeding. A clean, dry surface ensures maximum adhesion for the fastener strips.
3. Unpack and Inspect Your New Screen
Carefully unpack your magnetic screen door.
- Lay it out flat and check for any shipping damage.
- Identify the top of the screen (it's often marked or has a wider header) and the orientation of the magnetic closure. Ensure the magnets are attracting each other correctly down the seam.
- If you have a custom screen, double-check it against your door opening to confirm the sizing is as expected.
Step-by-Step Guide: Magnetic Mesh Screen Door Installation
This guide focuses on the common installation method using adhesive hook-and-loop fasteners, which is typical for Coverwith screens and many other quality magnetic screen doors. This is also largely applicable for a general "magic mesh installation," though quality of materials may vary by brand.
Step 1: Determine Screen Orientation and Test Fit (Optional but Recommended)
Before applying any adhesive, it's wise to do a quick test fit.
- Hold the screen up to your door opening, ensuring the top is at the top and the magnetic opening is in the center.
- Check that it covers the opening adequately with a slight overlap on the frame where the adhesive will go. For Coverwith custom screens, this fit should be perfect.
- Make sure the bottom of the screen just touches or is very slightly above the threshold to allow it to swing freely and close properly.
Step 2: Apply the Adhesive Hook Strip to the Door Frame
Your kit will include a roll of the hook side of the fastener (the rougher side) with an adhesive backing.
- Top First: Start by applying the hook strip along the top of your door frame. Peel back a small section of the adhesive backing, align the strip carefully, and press it firmly into place. Continue peeling the backing and pressing as you go along the full width of the top frame.
- Sides Next: Cut pieces for the side jambs. Apply them in the same way, starting from the top and working downwards. Ensure the strips are straight and firmly pressed onto the clean, dry frame.
- Press Firmly: Once all strips are in place, go back over them and press very firmly along their entire length to ensure a strong bond with the door frame. Some manufacturers recommend waiting for a short period (e.g., an hour or two, or even 24 hours for maximum bond strength, especially in cooler temperatures) before hanging the screen, but refer to your specific product's instructions.
Step 3: Attach the Magnetic Screen to the Frame
The loop side of the fastener (the softer side) is pre-sewn around the entire perimeter of your magnetic screen door.
- Start at the Top Center: Carefully align the top center of your screen with the top center of the hook strip on your door frame. Press it firmly into place.
- Work Outwards and Downwards: Working from the center outwards, press the top edge of the screen onto the top hook strip. Then, move to the sides, pressing the screen's edges onto the side hook strips, ensuring the screen hangs straight and is taut (but not overly stretched).
- Ensure Even Tension: You want the screen to hang smoothly with enough tension for the magnets to align and close properly. Avoid wrinkles or sags. If you have a custom-fit screen from Coverwith, achieving this even tension is much easier as the screen is already the correct size.
- Check the Bottom: Ensure the bottom of the screen hangs correctly, just clearing the threshold.
Step 4: Test the Magnetic Closure
This is the moment of truth!
- Walk through the screen several times from both directions.
- Observe if the magnets engage smoothly and quickly, creating a complete seal from top to bottom.
- If there are gaps or the magnets aren't aligning, you may need to slightly detach and reposition a section of the screen on the Velcro-like strips to improve the hang and tension. Small adjustments can make a big difference.
Step 5: Optional Reinforcement (Thumbtacks/Push Pins)
If your kit includes thumbtacks and you have a wooden door frame, you can use these for added security.
- Place them through the fabric border of the screen (and through the Velcro-like strips) into the wood frame at intervals, especially at the top corners and along the sides.
- Caution: Do not use these on metal or vinyl/PVC door frames as they will cause damage and won't hold effectively. The adhesive is the primary attachment for such frames.
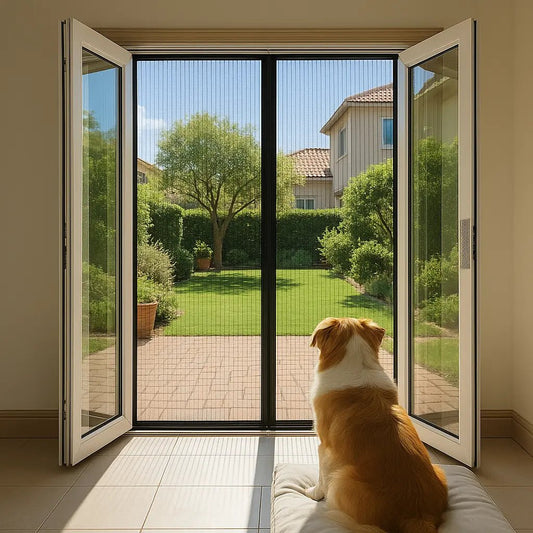
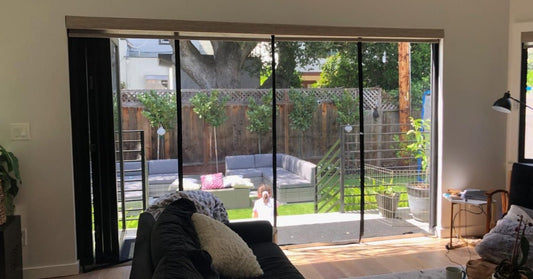
Special Considerations: How to Install Magnetic Screen Door on Sliding Door
Installing a magnetic screen door on a sliding glass door opening is a very popular application. The process is largely the same, but placement is key:
- Mount on the Fixed Frame: You typically install the magnetic screen onto the exterior or interior frame surrounding the entire sliding door unit, or just the frame around the opening of the active sliding panel.
- Covering the Opening: The idea is that when your sliding glass door is open, the magnetic screen covers that opening.
- Ensure Clearance: Make sure the placement of the adhesive strips and the hanging screen does not interfere with the normal operation (sliding) of your glass door panels. Usually, mounting it to the outer flat surface of the frame works well.
- Measure for the Opening, Not the Glass Panel: If you have a standard two-panel slider where one panel slides open, you'd measure the full width and height of that opening section that you want screened. A Coverwith custom screen made to these dimensions will provide full coverage.
This setup allows you to have your glass slider open for ventilation, with the magnetic screen providing easy, hands-free access and insect protection.
Addressing "Magic Mesh Installation" and Other Similar Brands
"Magic Mesh" became a well-known brand name for early "as seen on TV" style magnetic screen doors. The general magic mesh installation process is very similar to what's described above: usually adhesive strips, sometimes with tacks for wood frames.
Key Differences to Note When Comparing with Premium/Custom Options like Coverwith:
- Fit: Generic brands like Magic Mesh come in a few standard sizes. If your door isn't a perfect match, you might have excess material, a poor fit, or gaps. Coverwith screens are custom-made to your exact measurements for a perfect, gap-free fit.
- Material Quality: The mesh, border fabric, and magnet quality can vary significantly. Premium custom screens generally use more durable, UV-resistant mesh, stronger magnets, and more robustly stitched reinforced edges for longer life.
- Adhesive Strength: The quality and longevity of the adhesive on the hook-and-loop fasteners can differ. A stronger, more weather-resistant adhesive ensures the screen stays put.
- Aesthetics: A custom-fit screen with a neat border often looks more polished and integrated than a generic one that might be sagging or ill-fitting.
While the basic magic mesh installation steps are similar, the quality of the components and the precision of the fit from a custom provider like Coverwith can lead to a much better long-term experience.
The Key Difference: Installing a Magnetic Screen Unit vs. How to Install Screen Door Mesh
It's crucial to understand that when you're performing a magnetic screen door installation, you are installing a complete, finished product – the mesh is already integrated into the fabric panels with their magnetic closures.
The process of learning how to install screen door mesh is a completely different task. That refers to replacing only the mesh fabric within an existing traditional framed screen door (like an old aluminum sliding screen door or a hinged wooden screen door). Re-meshing involves:
- Prying out the old rubber spline that holds the old mesh in the frame's channel.
- Removing the old, damaged mesh.
- Cutting a new piece of screen mesh (e.g., standard fiberglass, aluminum, or pet screen).
- Using a spline roller tool to press the new mesh and new spline back into the frame's channel, keeping it taut.
You do NOT need to do any of these mesh installation steps when installing a magnetic screen door. The magnetic screen door arrives ready to hang as a complete unit. This is a significant reason why magnetic screen door installation is so much simpler and faster for most people.
Troubleshooting Your Magnetic Screen Door Installation
Even with a simple process, minor issues can arise:
-
Magnets Not Aligning/Closing Properly:
- Check screen tension. It might be too tight or too loose in one area. Detach and reposition that section on the Velcro-like strips.
- Ensure the screen is hanging perfectly straight from top to bottom.
- Make sure there's no debris caught between the magnets.
-
Screen Sagging:
- The top edge may not be attached firmly enough or evenly. Press it down again.
- You may need to re-tension the sides slightly.
-
Adhesive Strips Not Sticking:
- The door frame was not cleaned thoroughly or wasn't completely dry.
- The frame material might be difficult for adhesives (e.g., some types of textured paint or waxy surfaces). In such rare cases, using the provided thumbtacks (on wood) or seeking alternative mounting methods might be necessary.
- Extreme temperatures during application can affect adhesion.
Why a Custom-Fit Makes Installation (and Performance) Even Better
While many magnetic screens are easy to install, starting with a screen that is custom-made to your door's exact dimensions, like a Coverwith screen, simplifies the process further and enhances the final result:
- No Guesswork on Size: You know it will fit.
- Easier to Achieve Even Tension: No excess material to deal with or try to fold or trim.
- Perfect Seal: A screen made for your opening will naturally provide a better seal against insects.
- Professional Look: A perfect fit always looks more polished and intentional.
Conclusion: Enjoying the Breeze in Minutes with Easy Installation
The magnetic screen door installation process is designed to be a quick, simple, and rewarding DIY project for almost any homeowner. In usually less than half an hour, and often with no tools required, you can transform an ordinary doorway into a hands-free, pet-friendly, insect-blocking portal to fresh air. Whether you're installing it on a standard entry door, tackling how to install magnetic screen door on sliding door openings, or using a popular brand, the fundamental steps of cleaning, sticking, and hanging remain refreshingly straightforward.
By choosing a quality screen, especially a custom-fit option like those from Coverwith which are pre-sized perfectly for your opening, you ensure not only an easy setup but also a durable, effective, and aesthetically pleasing solution that you’ll enjoy for seasons to come. Forget complex instructions and a toolbox full of tools; the path to a breezier home is simpler than you think!
Ready for More Screen Door Projects and Tips?
You've now seen how easy magnetic screen door installation can be! If you're looking for guidance on other types of screen door setups, repairs, or how to choose and attach various screen doors around your home, our comprehensive pillar page on attaching a screen door is your next stop for expert advice.
[Explore All Screen Door Installation Techniques]
Frequently Asked Questions: Magnetic Screen Door Installation
How long does a typical magnetic mesh screen door installation take?
For most adhesive-mounted magnetic screen doors, the installation can be completed in 15-30 minutes. The most time-consuming part is usually ensuring the door frame is thoroughly cleaned and dried before applying the adhesive strips.
Do I need any special tools for a magic mesh installation or similar magnetic screens?
Generally, no special tools are required for installing adhesive-mounted magnetic screens like "Magic Mesh" or Coverwith products. A good cleaning cloth and cleaner for the frame are essential. Some kits include optional thumbtacks which would require a small hammer or firm pushing if used on a wooden frame.
What's the best way how to install magnetic screen door on sliding door so it doesn't interfere?
The key is to mount the magnetic screen on the stationary door frame surrounding the opening of your sliding glass door, typically on the exterior side. Ensure the adhesive strips are placed on the flat part of the frame so that the fully installed magnetic screen hangs just outside the path of the sliding glass panel. This allows the glass door to slide open and closed freely behind the magnetic screen.
My magnetic screen door isn't closing properly after installation. What did I do wrong?
The most common reasons are uneven tension or misalignment. Ensure the screen hangs straight and isn't pulled too tightly in one direction or sagging in another. The two center magnetic strips must be able to meet cleanly. Try detaching and carefully repositioning sections of the screen on the Velcro-like strips until the magnets align and snap together perfectly from top to bottom.
Is installing a magnetic screen door unit different from how to install screen door mesh into an old frame?
Yes, completely different! Installing a magnetic screen door involves hanging a pre-assembled unit (mesh panels with magnets and fabric borders) onto your door frame using adhesive strips. Learning how to install screen door mesh refers to the process of replacing only the mesh fabric in a traditional rigid screen door frame, which involves removing old spline, cutting new mesh, and using a spline tool – a more involved, separate skill.